Kaluma - Run JavaScript on the RP2040
Once intended as an animation tool for web browsers, JavaScript has had a fantastic career. Thanks to the browser wars, runtime performance improved consistently. As of now, JavaScript can be run on microcontrollers. Kaluma embodies this concept for the RP2040.
A Question of Lineage
Kaluma, with its project website found at https://kalumajs.org/download/, is an open-source JavaScript runtime based on the JerryScript environment.
As of this writing, it supports the Raspberry Pi Pico and all similar boards. Support for the Wi-Fi module found on the Raspberry Pi Pico W is currently in testing and should become stable in version 1.1.
Given that JerryScript is an open-source project, the product integrates itself into the rest of the JavaScript ecosystem. The development tools on the workstation live inside the Node.JS environment.
For the following steps, Yours Truly will experiment with an AMD octa-core workstation running Ubuntu LTS 20.04. The Node.JS version used in the following steps presents itself as follows:
tamhan@TAMHAN18:~$ node --version
v18.17.1
Thanks to the bootloader of the RP2040 chip, the deployment of the main firmware image is as simple as copying over a .uf2 file while the microcontroller is in bootloader mode. Should you have issues enabling boot mode, disconnect the board and reconnect it while holding the button marked in the figure.
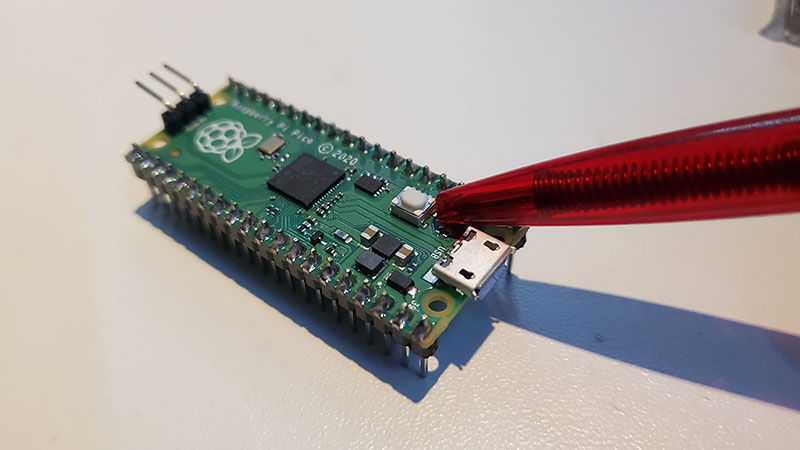
For the following steps, Yours Truly will experiment with version 1.0 - should you feel like using a later version of the JavaScript runtime, feel free to sprint ahead.
The next step deploys the command-line environment. It can be installed by entering the following command into the terminal emulator:
tamhan@TAMHAN18:~$ npm install -g @kaluma/cli
Depending on your system configuration, this call might fail with an error similar to npm ERR! Error: EACCES: permission denied, mkdir '/usr/lib/node_modules/@kaluma'. If this happens, rerun the command via sudo:
tamhan@TAMHAN18:~$ sudo npm install -g @kaluma/cli
Creating a Work Environment
Now that the deployment is complete, creating a working directory is next. It holds the JavaScript files which make up a solution.
Should you be working on Linux, the following commands are recommended. Alternatively, you are, of course, also free to use a file manager of your choice:
tamhan@TAMHAN18:~$ mkdir rp2040jsspace
tamhan@TAMHAN18:~$ cd rp2040jsspace/
Next, a JavaScript file is required:
tamhan@TAMHAN18:~/rp2040jsspace$ touch worker1.js
tamhan@TAMHAN18:~/rp2040jsspace$ pico worker1.js
JavaScript files intended for Kaluma do not need to be tokenized or compiled - the environment on the microcontroller can parse them more or less directly, which is why the .JS file is a text file just like the one you would use in a web browser or the node.JS environment. For the sake of laziness, Yours Truly will edit his file using the pico editor - using a different product, such as Visual Studio Code, is equally legitimate.
For a first test, we will then use the following bit of code:
const led = 25;
pinMode(led, OUTPUT);
setInterval(() => {
  digitalToggle(led);
}, 1000);
It uses the Raspberry Pi's signaling LED, which only works on non-W boards and is connected to GPIO 25. The setInterval method then ensures that the state of the pin is routinely toggled using the digitalToggle convenience function.
This code can then be run using the CLI:
tamhan@TAMHAN18:~/rp2040jsspace$ kaluma flash worker1.js
connected to /dev/ttyACM0
flashing .
After the message [90.00 Bytes] flashed shows up, the LED will start to blink around once per second.
Attempting Bit Banging on Kaluma
Traditionally, JavaScript runtimes are not well suited to real-time processing. We output a characteristic waveform in the following steps to give a more visual overview of real-time performance.
In principle, the waveform is structured as shown in the figure.
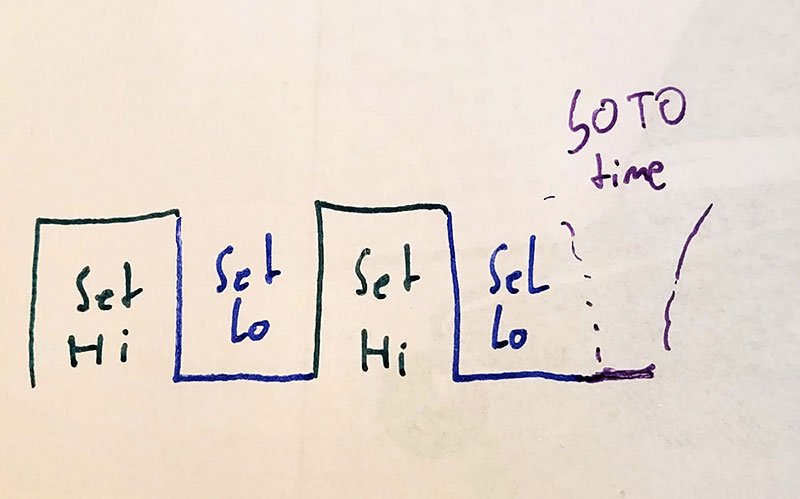
Given that the output waveform consists of the time for interaction with the hardware and the housekeeping time for running the loop, the length of the two wave troughs lets us learn more about the system's efficiency.
Such a waveform can be emitted by a program like this:
pinMode(2, OUTPUT);

while(1==1)
{
        digitalWrite(2, HIGH);
        digitalWrite(2, LOW);
        digitalWrite(2, HIGH);
        digitalWrite(2, LOW);
}
It can be deployed using the flash command. Connecting an oscilloscope to GPIO pin 2 shows a 25 kHz waveform of decent stability.
Sadly, problems arise the next time the flashing command is entered. It will hang in a fashion similar to the one shown in the figure - should this happen to you, use control + C to retake control.

Understanding the behavior at hand requires us to take a step back: our JavaScript code runs in an environment similar to the one shown in the figure. The runtime part of the system regularly needs compute time to perform housekeeping tasks (such as the downloading or accepting of code provided by the workstation).
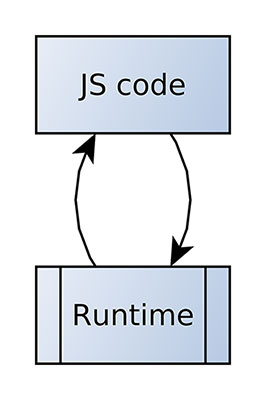
Given that our while loop never returns, the JavaScript environment would need to periodically halt the use of code execution to interact with the underlying hardware.
This is not the case here, which - incidentally - also informs us that functions such as digitalWrite execute directly. Other environments often delegate the interaction with hardware into the housekeeping time.
Be that as it may, recovering the RP2040 from this state is elaborate. Reflashing the runtime uf2 is not enough, as the JavaScript file resides in the flash memory and is not touched by the redeployment of the .UF2 file.
The only way to regain control is by first flashing the file found at https://github.com/dwelch67/raspberrypi-pico/blob/main/flash_nuke.uf2 - when it remounts the drive, the runtime .UF2 file can be redeployed to the microcontroller board.
After that, a more pedestrian method such as the following can be used:
pinMode(2, OUTPUT);
var timerId = setInterval(function () {
        digitalWrite(2, HIGH);
        digitalWrite(2, LOW);
        digitalWrite(2, HIGH);
        digitalWrite(2, LOW);
}, 1);
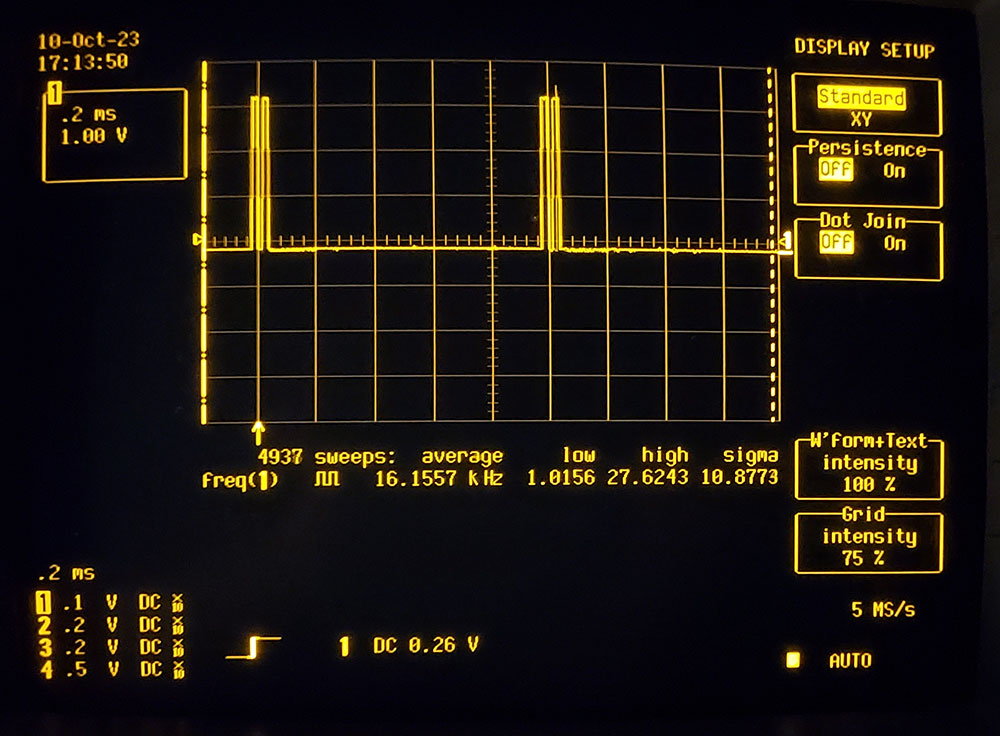
Given that we now regularly invoke setInterval, the JavaScript runtime component has ample time for housekeeping. Our figure shows the results seen on a LeCroy digital storage oscilloscope.
Learning More About the System
As of this writing, the environment supports almost every aspect of the RP2040 - the developers explicitly also mention support for the (highly custom) PIO fast-output engine.
Should you wish to find out more, two sources are useful: first of all, the official API documentation, which resides at https://kalumajs.org/docs. Secondarily, the GitHub repository https://github.com/kaluma-project/examples provides a wide variety of turnkey samples; finally, the resource list at https://kalumajs.org/docs/tutorials has Medium-hosted tutorials, which handled some use cases, such as the bring-up of the display shown in the figure below.
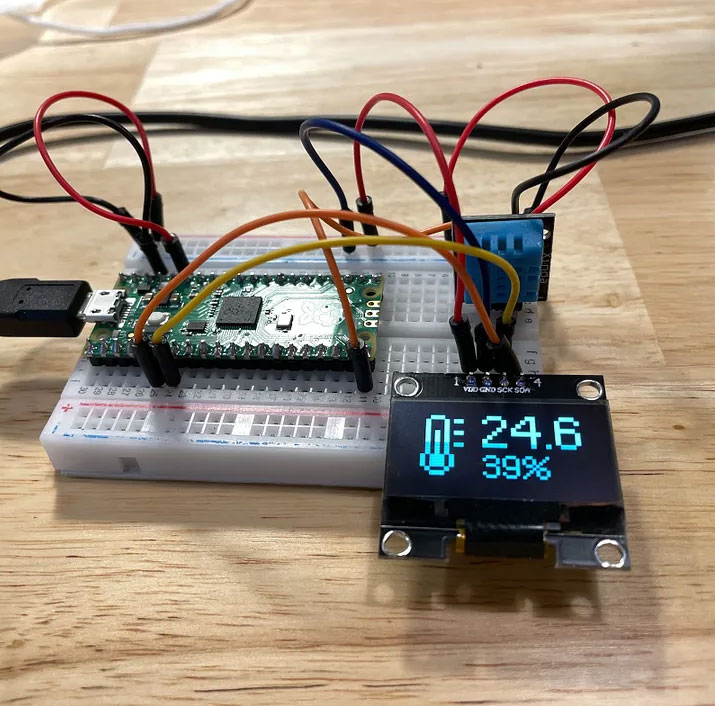
Finally, a short video showing the various command-line steps and some additional examples in action can be found at https://www.youtube.com/watch?v=g9WbyE8tHYs.
What's In It For Me?
While experienced embedded developers might balk at the idea of running JavaScript on a small system, the idea can make good sense in practice.
Ted Faison’s classic established the concept of code coupling mathematics, which claims that a reduction in code duplication - always - leads to an easier-to-maintain system. Kaluma provides a JavaScript runtime for the Raspberry Pi Pico, thereby permitting JavaScript execution on RP 2040. If your company has JS developers, this can be highly valuable.